Friends, this poncho pattern I’m sharing today is one I couldn’t wait to try. It starts with a simple ribbed collar and blooms outward into airy mesh, plump shells, and a delicate lacy edge, and somehow it manages to look elegant and effortless at the same time.
The instructor makes a tiny newborn version in the tutorial, but the same concept scales up beautifully for toddlers, kids, and even grown-ups. You’ll find the full visual walkthrough in the video by @Crochet_tota2, so you can stitch right along.
The Crochet Lace Poncho
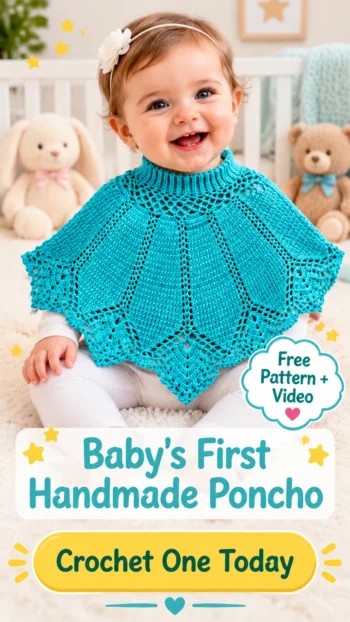
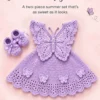
This poncho is worked top-down from a snug, stretchy collar, so it hugs the neck and then falls softly over the shoulders. Below it, a band of open mesh adds lightness, followed by generous double crochet shells separated by little V-shaped chain spaces.
Toward the bottom, the shells are gradually narrowed into triangles, and the poncho finishes with soft points at the front and back, framed by a lacy edging dotted with tiny picots. The result is light enough for a spring morning and pretty enough for a special occasion. It makes a sweet newborn gift or photo-shoot piece, and sized up, a romantic cover-up for yourself.
The instructor notes that you can make it in any color you love. For a baby, I’d choose soft white, cream, or blush pink for a classic heirloom look, or a gentle palette of sage, cream, and dusty rose if you want to play with stripes. For an older child or adult version, a warm mustard, a deep berry, or classic navy and white would make the shell texture really pop.
Materials and Tools
The tutorial uses a medium-weight yarn, and the instructor encourages you to use any medium-weight yarn you have on hand. She works with a 4.25 mm hook, but says you can choose your hook based on your yarn and on whether you want a looser, more open fabric or a tighter one. For a soft, drapey baby version, I’d reach for a smooth acrylic or cotton blend. You’ll also want a few stitch markers to mark the start of each round and the halfway point, a tape measure, and a yarn needle. Follow the video for the exact stitch counts used for each size.
Stitch by Stitch
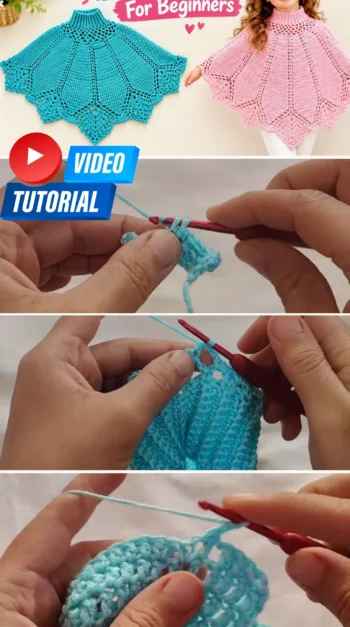
This project uses a handful of friendly stitches, combined in clever ways:
- CH (chain) builds the foundation for the collar and creates the airy mesh and the V-shaped spaces between the shells.
- SC (single crochet) in the back loop forms the ribbed collar, giving it that neat, stretchy texture that sits snugly around the neck.
- SL ST (slip stitch) joins the collar into a ring and closes rounds and anchors the picots on the final edge.
- DC (double crochet) is the star of the poncho, building the shells, the increases that widen the body, and the decreases and clusters that shape the triangles at the hem.
- HDC (half double crochet) is used to close each round neatly so the new round starts in the right place.
Once you settle into the shell repeats, the work takes on a calm, soothing rhythm that’s hard to put down.
Construction
The poncho begins with a short strip of back-loop single crochet rows worked flat. The instructor makes it as long as the head circumference minus about 10 cm, because the ribbing stretches easily over the head and still stays snug around the neck. The two short ends are then joined with slip stitches to form a ring, and the rest of the poncho is worked outward from one edge of this collar in joined rounds. A few rounds of chain mesh come first (no more than five, she suggests), then the shells are set up, and you alternate an increase round, adding a stitch at the start and end of each shell, with a plain round until the poncho is as wide as you like.
When the body is close to the desired length, the stitches are divided into two equal halves with markers, and a larger shell is worked at each halfway point to form the front and back points. From there, decrease rounds gradually turn each shell into a triangle until only a few stitches remain, and a final lacy round with picots finishes the edge. The collar, mesh, width, and length are all adjustable. Please follow the full video tutorial for exact counts and the complete pattern.
Beginner Tips
Measure your collar before you join it. The instructor’s head-circumference-minus-10-cm rule works because back-loop ribbing is very stretchy. If your yarn is less elastic, make the strip a little longer so it slips over the head comfortably.
Use markers generously. Each round is closed with a half double crochet and a new one begins from the middle of the previous space. Mark the first stitch of every round, and later place a second marker at the halfway point so both sides of the poncho stay even.
Keep the shells balanced. The instructor recommends having at least 13 double crochet stitches in each shell before you start shaping the points, so the triangles look full and neat. If your total shell count is uneven, add one in the next round, as the video demonstrates.
Wearing Your Crochet Lace Poncho
For a little one, slip it over a simple bodysuit or a soft dress for photos, family gatherings, or cool evenings outdoors. In a grown-up size, it looks lovely over a fitted top and jeans or a breezy summer dress.
Keeping Your Poncho Looking Its Best
Hand wash your poncho in cool water with a gentle wool or baby detergent, then press out the water in a towel rather than wringing. Lay it flat to dry, gently opening up the shells and smoothing the points and picots into shape; this light blocking makes the lace really shine. Store it folded in a drawer instead of on a hanger so the collar and points keep their shape over time.
Closing: A Personal Invitation
There’s something so special about wrapping a little one, or yourself, in a piece made stitch by stitch. This poncho is proof that a few simple stitches can come together into something truly elegant.
If you enjoyed this project, take a look at my other free crochet patterns:
Related Posts
And if you’re just starting out, visit the Guides section, where I’ve collected helpful articles about crochet basics and techniques: Beginner’s Guide to Crochet: Basic Crochet Techniques, Crochet Abbreviations and Terms for Beginners: A Detailed Overview, and 6 Basic Stitches in Crochet, Crochet Stitches Guide (Beginner Level).
Save this Poncho to your Pinterest crochet board so you can come back to it whenever you are ready to start.
Follow us on Pinterest and subscribe to the Newsletter so you don’t miss a thing!
Tutorial and photos of this poncho by: @Crochet_tota2.